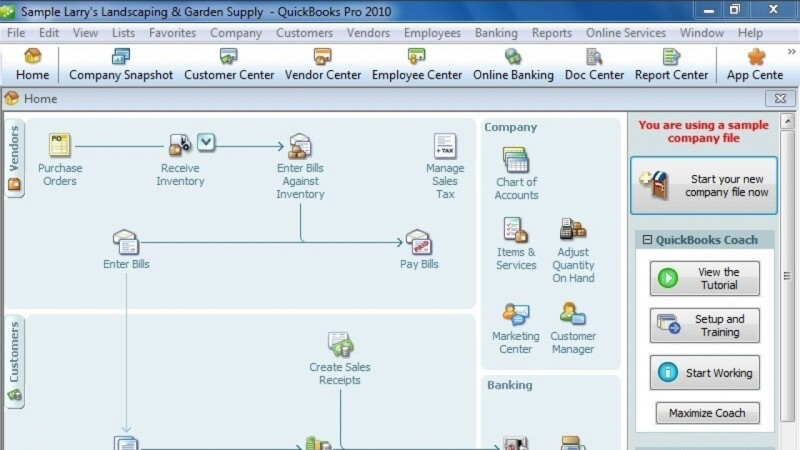
Hello, my name is Tahesha Strong. In these lessons, you will learn how to manually enter bank transactions and complete the corresponding bank reconciliation. We will use our sample product-based company, Rock Castle Construction, for these lessons. Let's get started. There are so many different ways to manually enter transactions within QuickBooks. One of the easiest ways is to enter each transaction directly into the check register. However, that does not always provide the audit trail needed in an accounting file. For this lesson, we'll be using our sample bank statement to go through a few different options. The first is our internet bill. Rock Castle pays this each month, so let's enter a bill to note the amount due and make our corresponding payment. Press the enter bills tile in the vendor workflow section of the homepage. We're paying our internet vendor. The date automatically populates. If there is a bill number or reference for the bill, we can enter that here. Also, if we did not manually receive a bill but know the amount is due, we can uncheck this box. Let's note the amount due of $75.99. Take note of the bill due date. QuickBooks automatically enters this bill due date based on the terms the vendor has selected. In this case, our vendor bill is due upon receipt. In the memo field, let's We have two tabs to note the details of the bill. Under the items tab, if this was a bill to one of our product or inventory vendors, we would be able to select the actual item and note it in the bill itself. In this case, we're paying for a service. We'll use the expenses tab, select the appropriate GL account, which is internet expense. The amount auto-populates based on the total of the bill. If we needed to break it up between two different accounts, we could adjust the amount here and note another account on the next line. In the memo field, let's Because this is overhead or administrative, we don't have a specific customer or job to relate this bill to, as such, it is not billable to a specific customer or job. If your company tracks classes, such as admin or overhead, you can select that in the dropdown menu here. Let's press save from the main tab above. In this same entry, we want to pay the bill. Let's take a look at the pay bill screen. At the top, we can show all the bills due on or before a specific date. We can show all the bills. We can filter the bills by a specific vendor, as we are here, and we can sort the bills by vendor. In this case, we're looking at all bills related to internet vendor. The amount to pay automatically populates as the full amount of the bill. Down at the bottom, if we had any discounts or credits to apply from the vendor, we would be able to do so here. Now, let's confirm our payment details. We'll leave the date as is. For the method, let's send this vendor a check. We'll allow QuickBooks to assign our check number and we want the payment to apply to our checking account. Press pay selected bill. QuickBooks gives you a summary of all of the bills paid in this transaction, in this case, we've only paid one bill. We can select to pay more bills or we can select done. Let's press done, let's close out of this screen and go back to our homepage. The next item on our bank statement is an electric bill. Let's assume that we already have the bill from the electric company and we're making a payment on the outstanding bill. Select the pay bills tile from the vendor workflow section of the homepage, now we can see that we have a full list of all bills as we discussed in the previous example. CU Electric has two outstanding bills that have not been paid. Let's select the earliest bill. As we noted, the amount to pay in the far right will automatically populate to the full amount due. Let's adjust it to the $253.68 If we wanted to pay more than this bill, we could select it by using the check boxes on the left. Let's complete this transaction by confirming the payment details at the bottom. We'll leave the pay date as is. Leave the method as a check, assigning the check number and making sure that it is posted to the checking account. Let's press pay selected bills. We'll allow QuickBooks to assign the check number. Press okay and done. The next item on our bank statement is a payment received from our customer, all QuickBooks applications have an undeposited funds holding account to track amounts received until they're formally selected to deposit, so to speak, into a company's bank account. Let's take a look at how to add items such as this to our bank account. Select banking from the main menu, then make deposits. This screen shows us a list of everything the company has received but not yet deposited into its bank account. This screen is the equivalent of a batch deposit detail that you would do one side at your bank. We can filter the transactions by the type of payment method, we can filter our view by the type of payment, we can sort the view by the type of payment or other options. We can filter the view by the payment method. We can sort the view by the date, payment method, payment number, the customer's name, or the amount of payment, and then from there, we select the items we wanna include in our batch deposit. In this case, let's select Lisa Williams' check. Press okay to continue, this is our deposit screen. You'll see we can select which bank account we'd like to deposit the check to, the date of our deposit, and if we'd like to note a certain memo. All of these items are automatically populated. We received the check from Lisa Williams. This is taking her check out of our undeposited funds account, we can add an additional memo if we like, her check number is noted. The payment method is we received her payment by check. If we wanted to note a class, we could do so here, and then the amount of the deposit. Towards the bottom of the screen, if for any reason you opted to have cash back when you deposited the funds in the bank, you will be able to note that transaction here, so when the total deposit posted from your bank account, you'll be able to match it to your QuickBooks transaction. Let's select save and close.