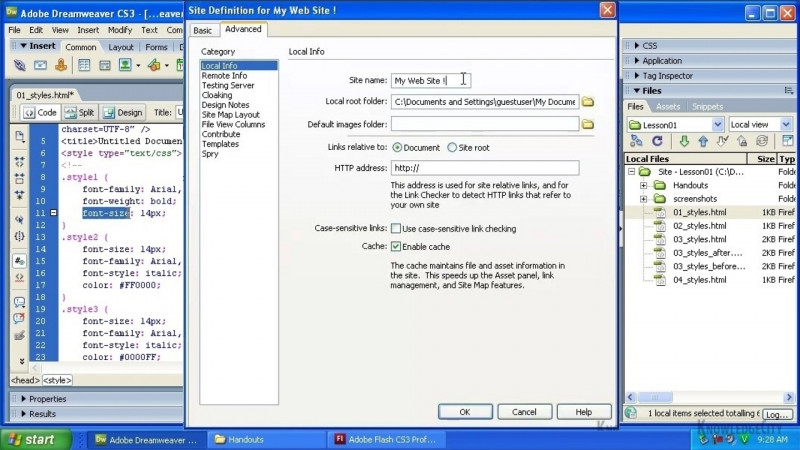
When we start up the Dreamweaver CS4 program, we get a welcome screen here, and it could be a little bit confusing if you're new to Dreamweaver. It looks like the easiest thing to do would be to create a new HTML page. However, when we're working with Adobe Dreamweaver CS4, we're actually working in terms of pages that are part of a site. So the first thing we actually want to do is set up a site project. So further down this create new menu on the welcome screen, it says Dreamweaver site, and I'm going to start there. That takes me to the site definition dialog box. The first thing I need to do is give my site a name, and this name is just internal to the Dreamweaver program, so I'll call this KCC1 for Knowledge City Chapter 1. If you are working with a site that's already live on the internet, you can enter the address of the site here. Since we're just creating something that's local to our computer, we'll leave this part blank. That's all we need to do for this screen, and you can go ahead and click the next button that you probably see. At my resolution, you don't see that, so I'm just going to hit the Enter or Return button on my keyboard to go to the next window. And here we have a question of whether we want to use a certain type of server technology for dynamically creating the content of our pages. Since this is an introductory course, we're not going to be covering this kind of thing, so we'll just keep it at no, I do not want to use a server technology, and use Next to go on to the next dialog box window. The next choice is where are my files, and how am I working with them? One of my options is I can have a local copy of my site stored on the computer I'm sitting at, and then when I'm ready to put the site live, I can upload it to the server. Or, if I have a live site and working on the files is not going to interrupt any of my website traffic, I can edit them directly on the server. For our purposes here in this lesson, we're going to be editing local copies since we're not on a server live, and we're going to edit the local copies on our machine. Down here, it asks us where are the files going to be stored, it's offering to create a folder for us in our current directory, specifically for this site project, and we'll go ahead and do that. Or, if we wanted to, we could click this folder button and navigate to a new set of folders or wherever it is that we'd like to store our files, but we'll leave this as is for now, and go ahead and move on to the next window. The next question is how do we connect to our remote server? There are a variety of ways to connect to your server, the most common is FTP, but there are other methods as well. Considering that we're not working live on a server, we can just leave it as none, and then go on ahead to the next screen. And here's just a summary of everything that we've chosen so far for this particular project, and everything looks pretty good, so we'll go ahead and hit enter. And you may have noticed the dialog box disappeared, and you also may have noticed that down here in the right-hand corner of the screen, under an area called the Files tab, we see the name of the folder, the dream we were just created for us, and we see that it's shaded in green. And that means that we for recognizes this folder just created as the location of our site files. And as long as we choose this site in our menu here, then all of our work is going to be saved into that folder, and all our site files will be kept together. So that is the basics of site creation, and we'll be covering that a little bit further in chapter two.